Thursday, 19 January 2023

1 - Ubuntu with LUKS: Backup and Restore with Veeam Part 1 - Installing Veeam agent for Linux

 First, let's get a few things out of the way.

  • This has nothing to do with virtual machines. This blog is about backing up a physical computer.
  • I'll be using Veeam Backup & Replication 11 (Build 11.0.1.1261) P20220302 and Ubuntu server 22.04.1 LTS. Veeam in this version does not officially support Ubuntu 22.10. This complicates things a little, as you will see, but it works.
  • I will focus on the Linux backup and bare-metal restore part. For all intents and purposes, it does not matter, if you use the standalone Veeam agent for Linux or the full VBR product. It does not matter, if you store the backup locally or on a remote repository. In this blog, I will use Veeam Backup & Replication Community Edition and store the backup in a remote repository.
  • There is some command line (shell) work required, but don't worry. It is mostly copy & paste.
  • You should already know how to work with Veeam in general. I will focus mostly on the parts the pertain to LUKS encryption and bare-metal restore.
  • I will use the server version of Ubuntu but it works the same way with the desktop version.

Part 1 - Installing Veeam agent for Linux


Saving the operating system disk device name in a variable


To find out the device name of the operating system disk, type df -h and look for the device that is the mount point for /boot and /boot/efi.

admin01@testlabubuntu01:~$ df -h  | grep boot
/dev/sda2                          2.0G  183M  1.7G  11% /boot
/dev/sda1                          1.1G  5.3M  1.1G   1% /boot/efi
admin01@testlabubuntu01:~$

In my case, the operating system disk is /dev/sda. Save the device name in a variable.

OSdisk='/dev/sda'

I will keep using this variable in all subsequent parts of this guide.

Understanding the disk layout


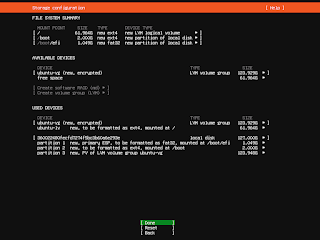
Understanding the disk layout is not strictly required. You may skip this part, if you are in a rush. If you went with the Ubuntu installer's default disk layout but you chose to check the checkbox for creating the LUKS encrypted container, this is what you end up with:

Ubuntu Setup: Encrypt the LVM group with LUKS

Ubuntu setup file system summary


sudo fdisk -l

Device       Start       End   Sectors   Size Type
/dev/sda1     2048   2203647   2201600     1G EFI System
/dev/sda2  2203648   6397951   4194304     2G Linux filesystem
/dev/sda3  6397952 266338270 259940319 123.9G Linux filesystem

admin01@testlabubuntu01:~$ lsblk -f $OSdisk
NAME FSTYPE FSVER LABEL UUID                                   FSAVAIL FSUSE% MOUNTPOINTS
sda
├─sda1
│    vfat   FAT32       A613-036C                                   1G     0% /boot/efi
├─sda2
│    ext4   1.0         4001732b-adc6-42fd-979c-4f7c117a0208      1.6G     9% /boot
└─sda3
     crypto 2           d8073181-5283-44b5-b4dc-6014b2e1a3c2
  └─dm_crypt-0
     LVM2_m LVM2        q0h4Ra-2nCU-G4fx-49uy-bhZ7-T5Og-2xc22Q
    └─ubuntu--vg-ubuntu--lv
       ext4   1.0         88b16848-6e7c-4a7c-ad48-05b9ae344bff       48G    16% /
admin01@testlabubuntu01:~$

In my case, /dev/sda is the operating system disk (and only disk in this computer). 

  • /dev/sda1 is the EFI system partition (ESP) and is mounted as /boot/efi. 
  • /dev/sda2 is the boot partiton and is mounted as /boot.
  • /dev/sda3 is where it's at. This partition is the encrypted LUKS container. Inside the container, there is the LVM with a volume group ubuntu--vg and inside there is a logical volume ubuntu--lv.
  • Also, note there are two mapper devices, dm_crypt-0 and ubuntu--vg-ubuntu--lv. dm_crypt-0 is the LUKS container and ubuntu--vg-ubuntu--lv is the opened LVM volume group which is mounted as /.

df -h
Filesystem                         Size  Used Avail Use% Mounted on
tmpfs                              387M  964K  386M   1% /run
/dev/mapper/ubuntu--vg-ubuntu--lv   61G  9.7G   48G  17% /
tmpfs                              1.9G     0  1.9G   0% /dev/shm
tmpfs                              5.0M     0  5.0M   0% /run/lock
/dev/sda2                          2.0G  1.1G  764M  59% /boot
/dev/sda1                          1.1G  5.3M  1.1G   1% /boot/efi
tmpfs                              387M  4.0K  387M   1% /run/user/1000

ls /dev/mapper/
control  dm_crypt-0  ubuntu--vg-ubuntu--lv

Note that for Ubuntu desktop, you have to check both the LVM and the encryption checkbox, as both are disabled by default if you want to end up with this setup.

Installing Veeam agent for Linux


Issues with installing Veeam agent for Linux on Ubuntu 22.04 or later host


The issue here is that Veeam right now, only supports Ubuntu up to version 21.10 and the agent cannot be installed from VBR console. Ubuntu 22.04 and higher will be supported only when Veeam 12 comes around. This is not because Veeam looks at the version string and refuses to install, it is because Ubuntu 22.04 does a few things differently under the hood, which causes installation to fail.

If you try to add a host running on Ubuntu 22.04 or higher to the VBR infrastructure, Veeam will report that that the OS is unsupported.

Veeam B&R adding Ubuntu 22.10 host to physical infrastructure

You can try to install the agent.

Veeam B&R installing agent on Ubuntu 22.10 host

But it will fail.


One reason for this is that Veeam needs the mlocate package for indexing and Ubuntu has removed this from Ubuntu 22.04.

It can be fixed by manually installing the agent.

Updating the system


Though not strictly required, I recommend you update everything and reboot.

sudo apt update
sudo apt upgrade
sudo apt reboot

From here on, I largely follow the official guide but like I wrote, installation will fail, so you need to change a few things.

Adding Veeam repository

Download the Veeam repository Debian Software Package. Veeam would have you sign up and create an account in order to get this file, but you can simply click on the link and you won't need to be logged in. You can find the latest version here without login. Or you can enter this command:

wget https://repository.veeam.com/backup/linux/agent/dpkg/debian/public/pool/veeam/v/veeam-release-deb/veeam-release-deb_1.0.8_amd64.deb

Add the Veeam repository.

sudo dpkg -i ./veeam-release* && apt-get update

You might get an error like this, but it can be safely ignored.

W: Problem unlinking the file /var/cache/apt/pkgcache.bin - RemoveCaches (13: Permission denied)

W: Problem unlinking the file /var/cache/apt/srcpkgcache.bin - RemoveCaches (13: Permission denied)

Optionally, you can verify that the repository is installed

admin01@testlabubuntu01:~$ grep veeam /etc/apt/sources.list /etc/apt/sources.list.d/*

/etc/apt/sources.list.d/veeam.list:deb [arch=amd64] http://repository.veeam.com/backup/linux/agent/dpkg/debian/public stable veeam

admin01@testlabubuntu01:~$

Update the repository

sudo apt update

Starting the Veeam agent for Linux installation


sudo apt-get install veeam

Note on UEFI Secure Boot: Since you chose LUKS encryption, it means you care to some extent about security, and you should also enable UEFI Secure Boot. Ideally, you do this before installing the agent because Veeam agent for Linux comes with a kernel module for snapshots and if Secure Boot is active, the kernel will be locked down and will not load the Veeam module unless it is signed. To work with Secure Boot, these requirements need to be met. Don't worry, this is taken care of mostly automatically, if Secure Boot is active before you install the agent.
  • A signed (pre) bootloader (shim) is installed
  • You have a Machine Owner Key (MOK) certificate
  • the MOK certificate is installed with shim
  • the Veeam kernel module is signed with the MOK certificate

Machine Owner Key (MOK) certificate enrollment


If Secure Boot is active at the time when the agent is installed and the MOK certificate is not enrolled already, you will be prompted to enroll the MOK certificate. This is a straightforward, mostly automated process. If you did not have Secure Boot active during the installation, but you decide to enable it later, you have to do this manually. See Veeam KB2260 Failed to load module [veeamsnap] as well as Ubuntu Blog: How to sign things for Secure Boot.

During Veeam agent for Linux installation you will see this screen.

Ubuntu Secure Boot MOK certificate enrollment info screen

Choose a password. This password will only be used temporarily, and can be discarded later.

Ubuntu Secure Boot MOK certificate enrollment password screen

Confirm the password.

Ubuntu Secure Boot MOK certificate enrollment password confirmation screen

When you are back on the prompt, the agent installation is finished. However, this does not take care of everything. You may notice, that the MOK certificate is still not enrolled but it is scheduled for enrollment.

mokutil --list-new

Because of this, the kernel module is available but cannot be loaded.

admin01@testlabubuntu01:~$ sudo modprobe veeamsnap
modprobe: ERROR: could not insert 'veeamsnap': Operation not permitted
admin01@testlabubuntu01:~$

Reboot and enroll the certificate.

sudo reboot

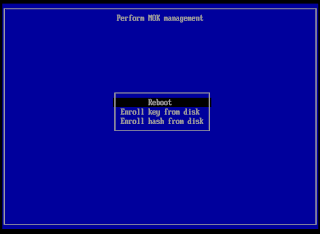
During boot, choose "Enroll MOK".

MOK certificate enrollment MOK management screen

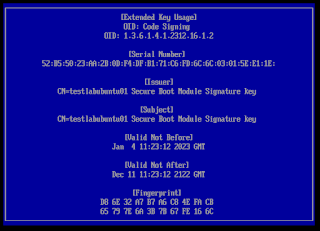
Optionally, you can view the key before you enroll it. It is a self-signed certificate for signing kernel modules (code signing) that Ubuntu generated for you.

MOK certificate enrollment MOK key

Back on the [Enroll MOK] screen (see screenshot above), choose "Continue". Answer "Enroll the key(s)?" with yes.

MOK certificate enrollment confirmation

You may see this screen and may have to select the key (there should only be one key), but I did not get this screen every time during my testing.

MOK certificate enrollment view key

Enter the password that you chose during the installation of Veeam agent for Linux. This password, as I understand it, is needed only for the enrollment of the MOK certificate and is then not needed any longer.

MOK certificate enrollment password

Now choose reboot and boot into Ubuntu as usual.

MOK certificate enrollment reboot

Optionally, you can now confirm that the key is enrolled. 

admin01@testlabubuntu01:~$ mokutil --list-enrolled | grep "Secure Boot Module Signature key"
        Issuer: CN=testlabubuntu01 Secure Boot Module Signature key
        Subject: CN=testlabubuntu01 Secure Boot Module Signature key
        Issuer: CN=testlabubuntu01 Secure Boot Module Signature key
        Subject: CN=testlabubuntu01 Secure Boot Module Signature key
admin01@testlabubuntu01:~$

You can see that this is a self-signed certificate, and that the veeamsnap module can now be loaded.

admin01@testlabubuntu01:~$ sudo modprobe veeamsnap
admin01@testlabubuntu01:~$ lsmod | grep veeamsnap
veeamsnap             200704  0
admin01@testlabubuntu01:~$

But don't forget to unload it because veeamsnap should only be loaded by Veeam while a backup job is running.

sudo rmmod veeamsnap

Optionally, you can now confirm that Veeam agent is installed.

admin01@testlabubuntu01:~$ whereis veeam
veeam: /usr/bin/veeam /usr/lib/veeam /etc/veeam /usr/share/veeam /usr/share/man/man8/veeam.8
admin01@testlabubuntu01:~$ apt list --installed | grep veeam

WARNING: apt does not have a stable CLI interface. Use with caution in scripts.

veeam-release-deb/stable,now 1.0.8 amd64 [installed]
veeam/stable,now 5.0.2.4567 amd64 [installed]
veeamsnap/stable,now 5.0.2.4567 all [installed,automatic]
admin01@testlabubuntu01:~$

Now proceed as you would with Veeam (either by setting up the agent and backup job locally or, in my case, by doing it from Veeam VBR console).

In my case, I have already added the Ubuntu host to a protection group (see above), and now I can rescan the host.

Veeam B&R rescan host

Now, VBR will detect the installed agent.

Veeam B&R protection group agent installed on Ubuntu 22.04

Veeam B&R console physical infrastructure agent installed on Ubuntu 22.04

Veeam B&R console Veeam agent for Linux version

In the next part, I will show how the backup is created.

No comments:

Post a Comment