Creating a backup job
In this part, I will show how to back up the entire operating system disk, including all of its partitions and volumes. Like I mentioned, I will not go through every single step that needs to be done here. I will focus on the part that is important when dealing with Ubuntu and LUKS encryption.
Choose backup mode Volume level backup.
")
In the Objects screen, add
- /dev/mapper/dm_crypt-0 as a device
- /dev/sda as a device.
/dev/sda here is the operating system disk and it might be called differently on your hardware. If it is an NVMe SSD, it would be /dev/nvme0n1. If you are unsure, type df -h and look for the device that is the mount point for /boot and /boot/efi.
admin01@testlabubuntu01:~$ df -h | grep boot
/dev/sda2 2.0G 183M 1.7G 11% /boot
/dev/sda1 1.1G 5.3M 1.1G 1% /boot/efi
admin01@testlabubuntu01:~$
")
A few notes on this, (which you may skip if you are in a hurry):
The reason for this is, if you only select /dev/sda, then /dev/sda3 (and the Ubuntu installation within) will not be backed up because Veeam does not support and does not "see" LUKS containers.
You could also choose "Entire Computer" as backup mode, but you might have good reasons as to why you don't want to do that. You might have separate backup jobs for the operating system and for data on other disks. Or you might have file systems like ZFS, that are not compatible with Veeam's volume snapshot mode.
If you have only one disk, backing up /dev/mapper/dm_crypt-0 as a device and /dev/sda as a device will lead to the same result as backing up "Entire computer".
You could also choose to backup /dev/mapper/ubuntu--vg-ubuntu--lv as LVM instead of /dev/mapper/dm_crypt-0 as a device but restore will be slightly different and I found it more straightforward to back up dm_crypt-0.
Another consideration for the backup job settings is encryption. Note, that the above settings will lead to Veeam backing up the data as plain text. That's okay because we can encrypt the backup too. Since you probably chose LUKS encryption during Ubuntu setup for a reason, it makes little sense to store the backup in plain text. I recommend you enable encryption in the backup job settings.

Now run the backup job as usual.
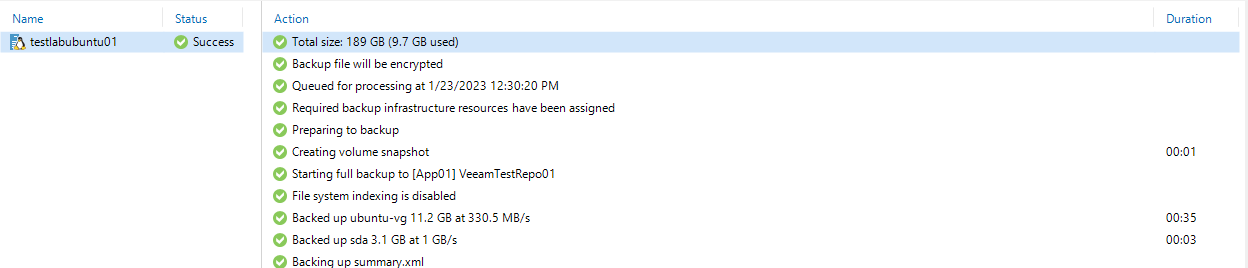

There are a few oddities here, that come from the fact that Veeam does not support LUKS containers. None of this will prevent you from doing the restore, however.
- Firstly, the total size (here: 189 GB) is wrong. The entire disk is only 127 GB large. This is because Veeam adds up the disk's total size (here: 127 GB) and the LVM volume group's size which was created by Ubuntu installer with 61 GB size.
- Secondly, it backed up ubuntu-vg even though we configured it to back up dm_crypt-0
How do I know this worked?
That is: How do I know that everything has been backed up?
The first hint can be seen in the backup job logs.
1/20/2023 10:48:50 AM :: Backed up ubuntu-vg 11.1 GB at 309.3 MB/s
1/20/2023 10:49:27 AM :: Backed up sda 3.1 GB at 911.9 MB/s
You should be able to see that only a small amount of data (ESP, boot partitions) was backed up as the physical disk device (here sda). Then there should be line that states that ubuntu-vg was backed up that should in size, roughly corresponds to how much data there is on the OS volume.
Note that Veeam's compression is not accounted for in this line of the job log and the total I am getting here is 14.2 GB of data backed up and 8 GB transferred and stored in the repository.
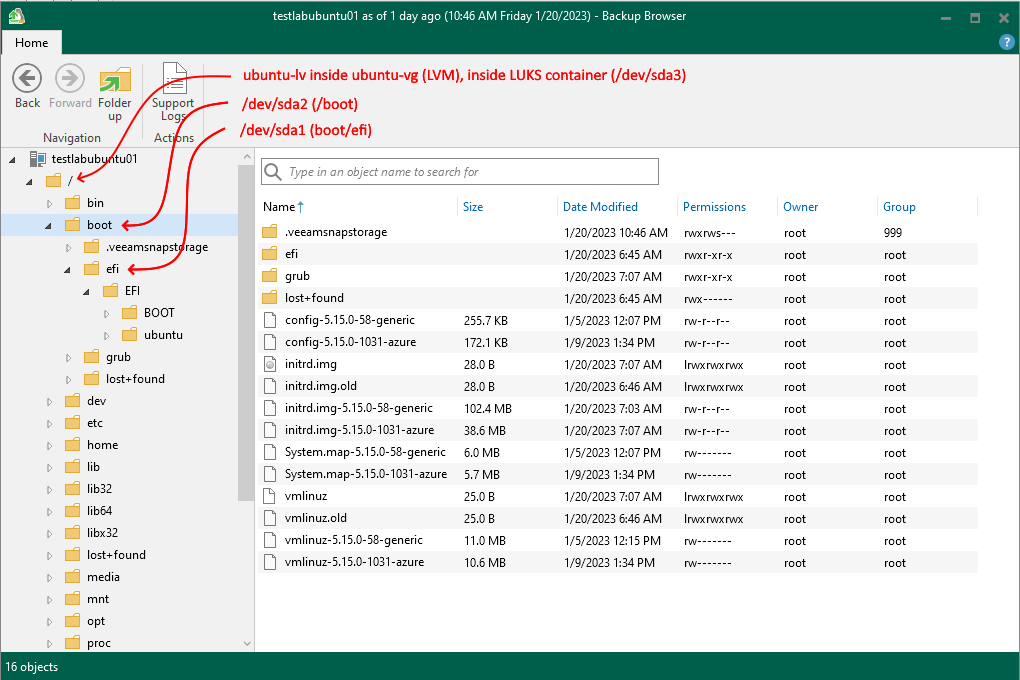
The next check can be done by trying to restore some files via Veeam's Guest File Restore feature. The name is incorrect here. We are a not dealing with a 'guest' (as in VM). We are dealing with a physical server. It will also state 'VM size' in the summary which is, again, not wrong.
It should show the usual Linux (Ubuntu) directory structure. The contents of /dev/sda1 (/boot/EFI) and /dev/sda2 (/boot) is also shown here, it will appear is if it was mounted into the root file system.
In the next part, I will show different options for creating the recovery media.
No comments:
Post a Comment