Tuesday 31 January 2023

Installing QNAP SnapAgent on Hyper-V Server 2019

In this blog, I will show how to install QNAP SnapAgent (QNAP's hardware VSS provider driver). The problem is that the installer refuses to install on Hyper-V Server (the free product).

Fixing "The product can only be installed on Windows Server 2008 R2 or above."


On the Hyper-V server, open regedit and navigate to: "Computer\HKEY_LOCAL_MACHINE\SOFTWARE\Microsoft\Windows NT\CurrentVersion"

Change the following key:

"InstallationType": change from "Server Core" to "Server".


Now install QNAP Snapshot agent. It should install fine. Don't forget to change the registry value back to what it was.


Source(s)

Saturday 28 January 2023

7 - Ubuntu with LUKS: Backup and Restore with Veeam Part 7 - Bare-metal restore: fixing LUKS container UUID

If you followed the previous part, you should now have restored all data, all partitions, the LUKS container, the LVM, the bootloader, etc.

If you reboot now, the system will not boot successfully because the bootloader (GRUB) is looking for the LUKS container with the UUID that it had before the restore. But you have created a new LUKS container and it now has a new UUID.

If you have not already done so, save the device name of your operating system disk in a variable. To find out the device name of the operating system disk, see part 1. In my case, the operating system disk is /dev/sda.

OSdisk='/dev/sda'

If you wrote down the original UUID like I suggested in the previous parts, you can now proceed by changing the UUID and you can skip the next step. If you did not write down the UUID, proceed here.


Verifying partition alignment and sector/cluster/block sizes


You should now verify that everything has been restored in exactly the way it was before. Confirm that all the sector/cluster/block sizes match with that they were before the restore. If sector/cluster/block sizes are chosen wrongly or if partitions are misaligned it can negatively impact performance. If you did not follow my guide, and you restored everything from within recovery UI, most likely it will not match. See the next part for more information on this.

Checking partition alignment


First, you can check if all three partitions are aligned properly.

veeamuser@veeam-recovery-iso:~$ sudo parted $OSdisk align-check optimal 1
1 aligned
veeamuser@veeam-recovery-iso:~$ sudo parted $OSdisk align-check optimal 2
2 aligned
veeamuser@veeam-recovery-iso:~$ sudo parted $OSdisk align-check optimal 3
3 aligned
veeamuser@veeam-recovery-iso:~$

Checking sector/cluster/block sizes


The goal here is to verify that everything has been restored in exactly the way it was before the restore. If you wrote it down or saved it as shown in part 4, this should be easy to confirm. If you didn't write it down, I will give some pointers, but if you want to be 100% sure, you can always install Ubuntu on the system, write down the setup (sector/block sizes, etc) that Ubuntu installer creates, and then wipe it and proceed with the restore.

If you don't know what the sector/cluster/block sizes were before the restore consider this:
  • During my testing, the block size of the /boot and /boot/efi partitions were always restored by Veeam exactly as they were before the restore. You can assume that the block size of /boot and /boot/efi partitions is also the block size that all the other partitions and volumes should have.
  • It should always be the same for all partitions, volumes and file systems. In practice, this should be 512 throughout or 4096 throughout because Ubuntu installer will choose either 512 or 4096.
  • Though I have not tested all configurations, it should be like this:
    • Disk is 512n (logical/physical sectors 512/512): Block size should be 512 throughout.
    • Disk is 512e (logical/physical sectors 512/4096): Block size should be 4096 throughout.
    • Disk is 4Kn (logical/physical sectors 4096/4096): Block size should be 4096throughout.
  • In other words: It looks like Ubuntu installer always sets the block size to what is reported as the physical sector size by the disk.
The steps will be the same as in Part 4 - Getting ready for bare-metal restore, except now you have a baseline to compare it to.

Check the LUKS container properties. 

admin01@testlabubuntu01:~$ sudo cryptsetup luksDump ${OSdisk}3 | grep -E 'sector|UUID'
UUID:           d8073181-5283-44b5-b4dc-6014b2e1a3c2
        sector: 4096 [bytes]
admin01@testlabubuntu01:~$

Of interest here is the sector size of the LUKS container and the container/partition UUID, but you might want to take note of some other properties here as well.

admin01@testlabubuntu01:~$ sudo cryptsetup luksDump ${OSdisk}3 | grep Cipher
        Cipher:     aes-xts-plain64
        Cipher key: 512 bits
admin01@testlabubuntu01:~$


Also note the partition layout. Of interest here is the logical and physical sector size.

admin01@testlabubuntu01:~$ sudo gdisk -l $OSdisk
GPT fdisk (gdisk) version 1.0.8
...
Sector size (logical/physical): 512/4096 bytes
...
First usable sector is 34, last usable sector is 266338270
Partitions will be aligned on 2048-sector boundaries
...
Number  Start (sector)    End (sector)  Size       Code  Name
   1            2048         2203647   1.0 GiB     EF00
   2         2203648         6397951   2.0 GiB     8300
   3         6397952       266336255   123.9 GiB   8300  LUKS
admin01@testlabubuntu01:~$


Though rather unimportant (unless you intend to restore to a disk with different logical/physical sector sizes), you can check the cluster size of the FAT32 formated EFI System Partition (ESP, here: /dev/sda1). I did not find a way to do this in Veeam recovery media, but if you created your own Ubuntu live based recovery media, as I have shown previously, you can install mtools.

sudo apt install mtools

And then use minfo. Look for sector size and cluster size. 

admin01@testlabubuntu01:~$ sudo minfo -i ${OSdisk}1 | grep -E 'sector size|cluster size'
Hidden (2048) does not match sectors (63)
sector size: 512 bytes
cluster size: 8 sectors
admin01@testlabubuntu01:~$

The cluster size is bytes is sector size * cluster size. here: 512 * 8 = 4096. You can ignore the warning 'Hidden (2048) does not match sectors (63)'. It just means that the partition is properly aligned.

Next is the /boot partition (EXT4), here /dev/sda2. Block size of /boot is also unimportant by the way, because it does not impact performance.

veeamuser@veeam-recovery-iso:~$ sudo tune2fs -l ${OSdisk}2 | grep "^Block size:"
Block size:               4096
veeamuser@veeam-recovery-iso:~$

As far as my testing goes, the sector/block size of the ESP and /boot partition will always be same after the restore as it was before the restore because Veeam restores them as they were before. To a fault actually, because when I tried to restore a backup from a 512e disk onto a 4Kn disk, this led to Veeam not properly restoring the ESP partition.

Next, check the block size of the LVM mapper device. This should be the same as the LUKS container sector size.

veeamuser@veeam-recovery-iso:~$ sudo blockdev --getss /dev/mapper/ubuntu--vg-ubuntu--lv
4096
veeamuser@veeam-recovery-iso:~$

Or you can use tune2fs.

veeamuser@veeam-recovery-iso:~$ sudo tune2fs -l /dev/mapper/ubuntu--vg-ubuntu--lv | grep "^Block size:"
Block size:               4096
veeamuser@veeam-recovery-iso:~$

You can also check with stat.

admin01@testlabubuntu01:~$ sudo stat -f /
  File: "/"
    ID: f16df925830148c0 Namelen: 255     Type: ext2/ext3
Block size: 4096       Fundamental block size: 4096
Blocks: Total: 15909803   Free: 13416161   Available: 12599880
Inodes: Total: 4063232    Free: 3949218
admin01@testlabubuntu01:~$

If you have saved this info in a file before, like I showed in part 4, you can now compare it directly to the restored system.

Enter the RestoreInfo folder (here: /mnt/home/admin01/RestoreInfo).

cd /mnt/home/admin01/RestoreInfo

Save the current properties. 

sudo cryptsetup luksDump ${OSdisk}3 > luksDump-restore
sudo gdisk -l $OSdisk > gdisk-restore
sudo minfo -i ${OSdisk}1 > minfo-part-1-restore
sudo tune2fs -l ${OSdisk}2 > tune2fs-part-2-restore
sudo blockdev --getss /dev/mapper/ubuntu--vg-ubuntu--lv > blockdevubuntu--vg-ubuntu--lv-restore
sudo tune2fs -l /dev/mapper/ubuntu--vg-ubuntu--lv > tune2fs-ubuntu--vg-ubuntu--lv-restore
sudo stat -f / > stat-root-file-system-restore

Compare it like so. For the luksDump command, the only thing that should be different is the UUID and a few crypt properties.

examples:
diff luksDump luksDump-restore
diff gdisk -w gdisk-restore

veeamuser@veeam-recovery-iso:/mnt/home/admin01/RestoreInfo$ diff luksDump luksDump-restore
6c6
< UUID:                 d8073181-5283-44b5-b4dc-6014b2e1a3c2
---
> UUID:                 f802c718-8ba1-4487-94af-13c382cf6372
24c24
<       PBKDF:      argon2id
---
>       PBKDF:      argon2i
28,29c28,29
<       Salt:       93 0e 2b 73 e2 58 d2 89 68 61 09 ec 4b 76 a4 c9
<                   55 18 49 c7 85 4d d9 2c 5a 18 3f 49 5d 16 31 9d
---
>       Salt:       a9 70 0a 3f 65 b9 39 82 f1 64 f0 66 f2 66 f5 98
>                   a9 2b 9c a0 09 04 a9 49 57 6c 8f f0 0d 8e 25 7a
39,43c39,43
<       Iterations: 129902
<       Salt:       b1 b2 5b 55 0e 16 eb d3 33 57 62 f7 a8 45 97 96
<                   6d e1 3b c0 cb e1 d7 6f 9f f8 7b 82 c7 8e 90 ea
<       Digest:     de 73 b8 89 70 17 65 f5 b0 5c f0 21 14 e0 cb 21
<                   e8 25 74 5b 8f a1 14 dc bf 54 89 a2 b0 53 fd 2f
---
>       Iterations: 141852
>       Salt:       4a e5 4e aa e5 f7 7b d3 c8 88 6f 08 6e 45 dc b1
>                   d3 2f c5 7a 00 63 8e d4 4c e1 87 c9 2c d3 ea 70
>       Digest:     c4 fe 0f a0 53 34 8f eb 67 b8 a4 50 54 76 17 13
>                   a9 7a fd 64 34 be ef 88 f0 a3 cd df 59 fe d8 d2
veeamuser@veeam-recovery-iso:/mnt/home/admin01/RestoreInfo$

veeamuser@veeam-recovery-iso:/mnt/home/admin01/RestoreInfo$ diff gdisk -w gdisk-restore
1c1
< GPT fdisk (gdisk) version 1.0.8
---
> GPT fdisk (gdisk) version 1.0.3
23c23
<    3         6397952       266336255   123.9 GiB   8300
---
>    3         6397952       266336255   123.9 GiB   8300  LUKS
veeamuser@veeam-recovery-iso:/mnt/home/admin01/RestoreInfo$

You can do this for every file.

Finding out the original LUKS container UUID

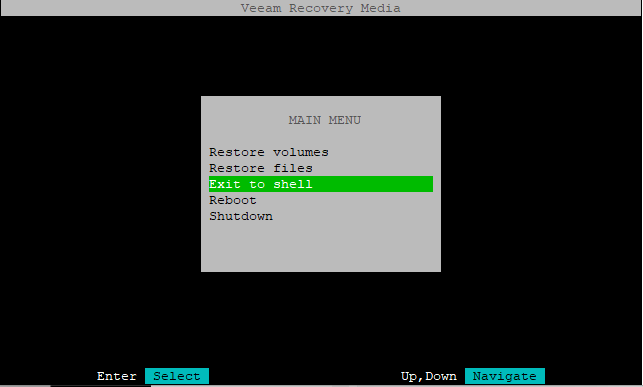
If you exited recovery UI, after restoring the LVM, as I showed in the previous part, the LUKS container will still be open and the LVM will be open too. In that case, you can proceed straight to mounting the root file system. If you rebooted for some reason, you now need to open the LUKS container.

You can check if the LUKS container is opened by looking for a mapper device.

veeamuser@veeam-recovery-iso:~$ ls /dev/mapper
 control                                          ubuntu--vg-ubuntu--lv
'luks-a6ef0f16-f6ef-46d8-ace7-071cbc3cec58\x0a'
veeamuser@veeam-recovery-iso:~$

In this case, you can see that both the LUKS container and the LVM are opened. If they are not opened, open them now.

veeamuser@veeam-recovery-iso:~$ sudo cryptsetup luksOpen ${OSdisk}3 dm_crypt-0
Enter passphrase for /dev/sda3:
veeamuser@veeam-recovery-iso:~$

The same goes for the LVM. If it isn't open, if you can't see it as /dev/mapper/ubuntu--vg-ubuntu--lv, open it. If the LUKS container has been opened successfully, the LVM should be found.

veeamuser@veeam-recovery-iso:~$ sudo vgscan
  Found volume group "ubuntu-vg" using metadata type lvm2
veeamuser@veeam-recovery-iso:~$

Open it.

veeamuser@veeam-recovery-iso:~$ sudo vgchange -ay ubuntu-vg
  1 logical volume(s) in volume group "ubuntu-vg" now active
veeamuser@veeam-recovery-iso:~$

You should now be able to mount the root file system.

Mounting the root file system


sudo mount /dev/mapper/ubuntu--vg-ubuntu--lv /mnt

Now, look at /mnt/etc/crypttab to find out, what the UUID was before the restore.

veeamuser@veeam-recovery-iso:~$ cat /mnt/etc/crypttab
dm_crypt-0 UUID=d8073181-5283-44b5-b4dc-6014b2e1a3c2 none luks
veeamuser@veeam-recovery-iso:~$

Setting the original LUKS container UUID


With that done, unmount the root file system.

sudo umount /dev/mapper/ubuntu--vg-ubuntu--lv

Now, close the LVM.

veeamuser@veeam-recovery-iso:~$ sudo vgchange -an ubuntu-vg
  0 logical volume(s) in volume group "ubuntu-vg" now active
veeamuser@veeam-recovery-iso:~$

Close the LUKS container. If you opened the container through recovery UI, it will be named something like this (check the name in /dev/mapper/).

sudo cryptsetup luksClose /dev/mapper/luks-a6ef0f16-f6ef-46d8-ace7-071cbc3cec58\x0a

But in my case, it is called dm_crypt-0.

sudo cryptsetup luksClose /dev/mapper/dm_crypt-0

Get the current LUKS container UUID.

veeamuser@veeam-recovery-iso:~$ sudo cryptsetup luksUUID ${OSdisk}3
a6ef0f16-f6ef-46d8-ace7-071cbc3cec58
veeamuser@veeam-recovery-iso:~$

Compare this to the UUID in /mnt/etc/crypttab: d8073181-5283-44b5-b4dc-6014b2e1a3c2. Although the UUIDs will be different for you, they do not match. This is the reason why GRUB would not be able to find the LUKS container, if you rebooted now. The LUKS container would not be opened during boot. The root file system would not be found.

Now set the UUID of the LUKS container to what it was before the restore. Do not attempt to do this the other way around, by updating /mnt/etc/crypttab with the new UUID. You would have to update the GRUB config if you did.

veeamuser@veeam-recovery-iso:~$ sudo cryptsetup luksUUID --uuid d8073181-5283-44b5-b4dc-6014b2e1a3c2 ${OSdisk}3
WARNING!
========
Do you really want to change UUID of device?
Are you sure? (Type uppercase yes): YES
veeamuser@veeam-recovery-iso:~$

Optionally, you can now confirm, that the UUID has been updated and matches that of the UUID in /mnt/etc/crypttab.

veeamuser@veeam-recovery-iso:~$ sudo cryptsetup luksUUID ${OSdisk}3 
d8073181-5283-44b5-b4dc-6014b2e1a3c2
veeamuser@veeam-recovery-iso:~$

Remove the recovery media and reboot.

sudo reboot

If everything went well, you will be asked for the LUKS password during boot.


Followed by the login prompt.


This is it. For some troubleshooting tips, the explanation as to why you should not use the UI to re-create LUKS, LVM, and some other things, see the next parts.

6 - Ubuntu with LUKS: Backup and Restore with Veeam Part 6 - Bare-metal restore: LUKS, LVM, root file system

If you followed part 3, you should still be in the recovery media environment. You should have restored the GPT table, the EFI system partition and the /boot partition. 

If you have not already done so, save the device name of your operating system disk in a variable. To find out the device name of the operating system disk, see part 1. In my case, the operating system disk is /dev/sda.

OSdisk='/dev/sda'

Your partition table should look something like this.

ubuntu@ubuntu:~$ sudo gdisk -l $OSdisk
GPT fdisk (gdisk) version 1.0.9
...
Partition table scan:
  MBR: protective
  BSD: not present
  APM: not present
  GPT: present
...
Number  Start (sector)    End (sector)  Size       Code  Name
   1            2048         2203647   1.0 GiB     EF00
   2         2203648         6397951   2.0 GiB     8300
ubuntu@ubuntu:~$

There are two partitions (in my case /dev/sda1, /dev/sda2).

The issue with Veeam and LUKS containers


Veeam does not support backing up LUKS containers. Let's take a moment here to consider what this means in practice. Have a look at what is in the backup.


              CURRENT SYSTEM           │              IN BACKUP
                                       │
     Device       Restore      Size    │  Device       Size    Usage
                                       │
     sda                       127.0G  │  mapper/dm... 123.9G
                                       │  sda          127.0G
                                       │   sda1        1.04G   /boot/efi...
                                       │   sda2        2.00G   /boot (ext4)
                                       │  ubuntu-vg    123.9G
                                       │   ubuntu-lv   61.96G  / (ext4)

Compare this to what the partition table looked like when the backup was made (see part 1), This is the partition table that was created by Ubuntu installer.

Device       Start       End   Sectors   Size Type
/dev/sda1     2048   2203647   2201600     1G EFI System
/dev/sda2  2203648   6397951   4194304     2G Linux filesystem
/dev/sda3  6397952 266338270 259940319 123.9G Linux filesystem

Now consider, what should have been backed up according to the backup job settings (see part 1).

/dev/mapper/dm_crypt-0
/dev/sda

Note that /dev/sda3, the partition that holds the LUKS container, is missing from the backup. This is because Veeam did not back it up. The same would have happend if you had chosen to back up the 'Entire computer' in the backup job settings.

Re-creating LUKS partition


If you recall from the first part, the LUKS container was in the third partition on the disk. It is important, that you do not do this in the Veeam recovery UI. I will explain this later.

List the free space on the disk

veeamuser@veeam-recovery-iso:~$ sudo parted $OSdisk print free
Model: Msft Virtual Disk (scsi)
Disk /dev/sda: 136GB
Sector size (logical/physical): 512B/4096B
Partition Table: gpt
Disk Flags:

Number  Start   End     Size    File system  Name  Flags
        17.4kB  1049kB  1031kB  Free Space
 1      1049kB  1128MB  1127MB  fat32              boot, esp
 2      1128MB  3276MB  2147MB  ext4
        3276MB  136GB   133GB   Free Space

veeamuser@veeam-recovery-iso:~$

The third partition will be created in the free space after the second partition (/boot). Here, it starts at 3276MB. Create the partition for the LUKS container.

veeamuser@veeam-recovery-iso:~$ sudo parted -a optimal $OSdisk  mkpart LUKS 3276MB 100%
Information: You may need to update /etc/fstab.

veeamuser@veeam-recovery-iso:~$

The result should like this.

veeamuser@veeam-recovery-iso:~$ sudo parted $OSdisk print
Model: Msft Virtual Disk (scsi)
Disk /dev/sda: 136GB
Sector size (logical/physical): 512B/4096B
Partition Table: gpt
Disk Flags:

Number  Start   End     Size    File system  Name  Flags
 1      1049kB  1128MB  1127MB  fat32              boot, esp
 2      1128MB  3276MB  2147MB  ext4
 3      3276MB  136GB   133GB                LUKS

veeamuser@veeam-recovery-iso:~$

Now it is time to re-create the LUKS container.

Re-creating LUKS container


Once again, do not do this in the recovery UI. 

Notes on LUKS container sector size


Note the --sector-size parameter below. If you need this, and what it should be will depend on your physical disk. In part 1, I showed how to determine the LUKS sector size of the container that is created by Ubuntu installer. You should aim to re-create the container with the same sector size that it had before the restore.  If you don't know what the sector size was before the restore, it gets tricky. 

By default, if no --sector-size parameter is supplied, cryptsetup will try to find the optimal sector size, depending on the properties of the physical disk. But this does not always lead to the same result as with the LUKS container that is created by Ubuntu installer. I will go into more details about this in the next part. For now, if you don't know what the sector size of the LUKS container should be, consider your physical disk.

veeamuser@veeam-recovery-iso:~$ sudo gdisk -l $OSdisk | grep physical
Sector size (logical/physical): 512/4096 bytes
veeamuser@veeam-recovery-iso:~$

This is the old 512n, 512e, 4Kn issue. Basically, there are three possibilities.

  • 512n (logical/physical: 512/512 bytes)
    In this case, it would be best, to set the sector size to 512 and cryptsetup should do this by default, if no --sector-size parameter is supplied. I did not test what Ubuntu installer uses in this case.
  • 512e (logical/physical: 512/4096 bytes)
    Here, Ubuntu installer will use a sector/block size of 4096 for all partitions. (ESP, here: /dev/sda1, /boot, here: /dev/sda2, LUKS here: /dev/sda3). But cryptsetup will default to 512 which is why it is necessary to set 
    --sector-size=4096 if you want to re-create the LUKS container exactly as it was before the restore.
  • 4Kn (logical/physical: 4096 /4096 bytes)
    I have not tested this, but presumably, Ubuntu installer will also default to 4096 and cryptsetup will also default to 4096. You can also set --sector-size=4096.
Once you know, what sector size you need, proceed to create the LUKS container.


Re-creating LUKS container


Note, that ${OSdisk}3 in my case is /dev/sda3. If the partition start and end are not both aligned to the sector size, this will fail. More about that in the next part.

veeamuser@veeam-recovery-iso:~$ sudo cryptsetup luksFormat --sector-size=4096 ${OSdisk}3

WARNING!
========
This will overwrite data on /dev/sda3 irrevocably.

Are you sure? (Type uppercase yes): YES
Enter passphrase for /dev/sda3:
Verify passphrase:
veeamuser@veeam-recovery-iso:~$

Once the LUKS container is created, return to the recovery UI.

Restoring LVM and root file system


Enter recovery UI. On Ubuntu live based recovery media, enter

sudo veeamconfig recoveryui

On generic or custom Veeam recovery media, enter

sudo veeam

Choose 'Restore volumes'


Select your backup just as you did in part 3.


You will now be notifed that a crypto device was found. This is the LUKS container you just created.

Found 1 crypto devices. Do you want to decrypt them all?
[Yes]   [No]


Choose yes and enter the password.


In the overview, it should now look like this. There should be the third partition (here: sda3) and the opened LUKS container (here: luks-c0...).

              CURRENT SYSTEM           │              IN BACKUP
                                       │
     Device       Restore      Size    │  Device       Size    Usage
                                       │
     sda                       127.0G  │  mapper/dm... 123.9G
      sda1                     1.04G   │  sda          127.0G
      sda2                     2.00G   │   sda1        1.04G   /boot/efi...
      sda3                     123.9G  │   sda2        2.00G   /boot (ext4)
       luks-a6...              123.9G  │  ubuntu-vg    123.9G
                                       │   ubuntu-lv   61.96G  / (ext4)


In 'CURRENT SYSTEM', select the LUKS container (here: luks-c0...). Map it to mapper/dm_crypt-0 by choosing 'Restore from' and selecting mapper/dm_crypt-0. If this works, skip the next step and move on to restoring LVM and root file system. 

Only, if you get 'The device is too small'


If you get an error 'The device is too small' perhaps because you are restoring to different hardware, no problem. Proceed by manually creating the LVM.


'The device is too small': manually creating the LVM


In 'CURRENT SYSTEM', select the LUKS container (here: luks-c0...). Select 'Create a new volume group'.


Choose the name 'ubuntu-vg' as this is what Ubuntu installer uses.


Map ubuntu-lv into 'ubuntu-vg'. Proceed as shown below.

Proceed with restoring LVM and root file system


Whether you were able to map the two crypto mapper devices, or you had to manually re-create the LVM, it should now look like this.


              CURRENT SYSTEM           │              IN BACKUP
                                       │
     Device       Restore      Size    │  Device       Size    Usage
                                       │
     sda                       127.0G  │  mapper/dm... 123.9G
      sda1                     1.04G   │  sda          127.0G
      sda2                     2.00G   │   sda1        1.04G   /boot/efi...
      sda3                     123.9G  │   sda2        2.00G   /boot (ext4)
       luks-a6...              123.9G  │  ubuntu-vg    123.9G
     ubuntu-vg                 123.9G  │   ubuntu-lv   61.96G  / (ext4)
      ubuntu-lv   ubuntu--v... 61.96G  │
      free                     61.96G  │


Proceed with the restore. Output will be slightly different, if you had to manually re-create the LVM.

                                RECOVERY SUMMARY
   1. Add dm-0 (dm) to ubuntu-vg group
   2. Create ubuntu-lv volume on ubuntu-vg group
   3. Restore ubuntu-vg/ubuntu-lv (dm) to ubuntu-vg/ubuntu-lv (dm)


     Restore                      100%                     Status: Success


      Time             Action                                   Duration

      08:42:55         Job started at 2023-01-23 08:42:55 UTC
      08:42:57         Starting volume restore
      08:45:09         Waiting for backup infrastructure res... 00:00:02
      08:45:11         Applying changes to disks configuration  00:00:00
      08:45:11         ubuntu--vg-ubuntu--lv restored 62 GB ... 00:01:03
      08:46:14         Processing finished at 2023-01-23 08:...


Even though all data, partitions, volumes, etc, have been restored, do not reboot because the system will not boot. Exit to shell and proceed with the next part.

Monday 23 January 2023

5 - Ubuntu with LUKS: Backup and Restore with Veeam Part 5 - Bare-metal restore: EFI and bootloader

I previous parts, I showed how to use Veeam to back up Ubuntu that is installed inside a LUKS container. I also showed how to prepare for bare-metal restore. In this part, I will show how to restore the backup to bare-metal.

The challenge here is that Veeam does not back up, nor restore LUKS containers but I previously showed how to back up the contents of the LUKS container, and therefore you would be right to assume that it should be fine if you can manually re-create the LUKS container. But first things first. You should now have the following things ready.

  • backup
  • hardware that the backup will be restored to
  • recovery media
  • you have knowledge of the 
    • operating system disk physical properties
    • partition layout 
    • file system sector/block sizes
    • LUKS container properties

But I did not do the steps described in previous parts while I was still able to access my Ubuntu computer and now, I cannot access the Ubuntu installation anymore! What can I do?


If you followed my guide, you should have all of the things mentioned above, but if you just have the backup and the hardware but nothing else, it should be fine. What you don't have is
  • Veeam Recovery media
    Go back to the previous part and create a recovery media. You will find the information on how to download a Veeam generic recovery media or how to create your own Ubuntu live based recovery media.
  • Information on disk sector size, partition table and LUKS container, etc.
    Not in this part, but in the next part, you will be using some of the information collected previously. If you don't have that, look out for some additional information that I have added to the guide.

Booting into the recovery media


You can use the custom Veeam recovery media you have created, the downloaded generic recovery media, or the Ubuntu live based media. The instructions from here on will work for all types of recovery media.

If you boot into the Veeam recovery media (generic or custom), you can choose between doing the restore locally or via SSH.


In this case, I will use an Ubuntu live based recovery media, 


Since this is bare-metal recovery, you should now exit to shell and confirm that the disk does not contain any partitions.


Save the device name of your operating system disk in a variable. To find out the device name of the operating system disk, see part 1. In my case, the operating system disk is /dev/sda.

OSdisk='/dev/sda'

Preparing the disk


Optionally, you can look at the operating system disk's partition table to confirm that the disk is empty.

sudo gdisk -l ${OSdisk}

In this case, there is already a partition on the disk, but not the kind of partition that would be useful during restore.

ubuntu@ubuntu:~$ sudo gdisk -l ${OSdisk}
...
Partition table scan:
  MBR: protective
  BSD: not present
  APM: not present
  GPT: present
...
Found valid GPT with protective MBR; using GPT.
...
Number  Start (sector)    End (sector)  Size       Code  Name
   1            2048       266336255   127.0 GiB   4200  Windows LDM data
ubuntu@ubuntu:~$

You can wipe the partiton table.

ubuntu@ubuntu:~$ sudo wipefs --all ${OSdisk}
/dev/sda: 8 bytes were erased at offset 0x00000200 (gpt): 45 46 49 20 50 41 52 54
/dev/sda: 8 bytes were erased at offset 0x1fbffffe00 (gpt): 45 46 49 20 50 41 52 54
/dev/sda: 2 bytes were erased at offset 0x000001fe (PMBR): 55 aa
/dev/sda: calling ioctl to re-read partition table: Success
ubuntu@ubuntu:~$

And confirm that disk shows as empty.

ubuntu@ubuntu:~$ sudo gdisk -l ${OSdisk}
...
Partition table scan:
  MBR: not present
  BSD: not present
  APM: not present
  GPT: not present
...
Number  Start (sector)    End (sector)  Size       Code  Name
ubuntu@ubuntu:~$

Accessing the backup


Now it is time to return to Veeam recovery UI. On Ubuntu live based recovery media, enter

sudo veeamconfig recoveryui

On generic or custom Veeam recovery media, enter

sudo veeam

Choose 'Restore volumes'


Locate the backup. In my case, I will connect to a VBR server.


You should now see what it is the backup.

Restoring GPT partition table, EFI system partition (ESP) and /boot partition


Note that the GPT table is not technically restored, rather, a new partition table is created.
 
On the left column (current system), select your operating system disk (here sda) and choose 'Restore from'.


Here, in 'Select to restore' choose sda (or whatever it is on your system).


You have mapped the current disk to the disk from the backup. It should look like this.


              CURRENT SYSTEM           │              IN BACKUP
                                       │
     Device       Restore      Size    │  Device       Size    Usage
                                       │
     sda                       127.0G  │  mapper/dm... 123.9G
      sda1        sda1 (/bo... 1.04G   │  sda          127.0G
      sda2        sda2 (/boot) 2.00G   │   sda1        1.04G   /boot/efi...
      free                     123.9G  │   sda2        2.00G   /boot (ext4)
                                       │  ubuntu-vg    123.9G
                                       │   ubuntu-lv   61.96G  / (ext4)

Proceed with the restore. At this point you are probably wondering why you can't proceed in the UI to restore the third partition, (here it would be: /dev/sda3), then create a new LUKS container, create a new LVM and then map ubuntu-lv into that LVM. You could, but there is a problem with doing it that way. I will get to that later.


                                RECOVERY SUMMARY
   1. Create GPT partition table on sda (scsi)
   2. Create partition sda1 on sda (scsi)
   3. Create partition sda2 on sda (scsi)
   4. Restore sda1 (scsi) to sda1 (scsi)
   5. Restore sda2 (scsi) to sda2 (scsi)

The result should look like this.


     Restore                      100%                     Status::Successg

      Time             Action                                   Duration
      15:57:52         Job started at 2023-01-22 15:57:52 UTC
      15:57:54         Starting volume restore
      16:00:05         Waiting for backup infrastructure res... 00:00:02
      16:00:08         Applying changes to disks configuration  00:00:00
      16:00:08         sda1 restored 1 GB at 1.3 GB/s           00:00:01
      16:00:09         sda2 restored 2 GB at 950.8 MB/s         00:00:02
      16:00:11         Restoring efi                            00:00:00
      16:00:11         Restore EFI volume: /dev/sda1
      16:00:11         Restore EFI boot manager entry: ubuntu
      16:00:11         Processing finished at 2023-01-22 16:...

Do not reboot yet.

Confirming that this worked


Exit to shell

Optionally, confirm that /dev/sda1, /dev/sda2 have been restored and that the GPT table is present.

ubuntu@ubuntu:~$ sudo gdisk -l ${OSdisk}
...
Partition table scan:
  MBR: protective
  BSD: not present
  APM: not present
  GPT: present
...
Number  Start (sector)    End (sector)  Size       Code  Name
   1            2048         2203647   1.0 GiB     EF00
   2         2203648         6397951   2.0 GiB     8300
ubuntu@ubuntu:~$

Optionally, confirm that the pre-bootloader (shim) is registered with the UEFI firmware. 

ubuntu@ubuntu:~$ sudo efibootmgr --verbose 
BootCurrent: 0001
Timeout: 1 seconds
BootOrder: 0001
Boot0001* ubuntu        HD(1,GPT,1f6fb137-bbf6-4282-8a83-fe4de68dee96,0x800,0x219800)/File(\EFI\ubuntu\shimx64.efi)
ubuntu@ubuntu:~$

Remain on the shell, do not reboot. In the next part, I will show how to restore the root file system, including all the bells and whistles (LVM, LUKS).